Pine Needles and Pesto: A Foraged Meal

On a recent Tuesday afternoon, seated outside on rows of bleachers, a handful of students took several leaps of trust in us, themselves, and the natural world. Bottles of pungent sodas were popped and weeds were seasoned, blended, and fried, all with an air of cautious optimism. 

“Oh! That’s actually kind of good!”

Our two educators sitting on the left, prepping our meal, while the Saul High School students sit on the bleachers on the right, discussing the process of cooking with foraged foods

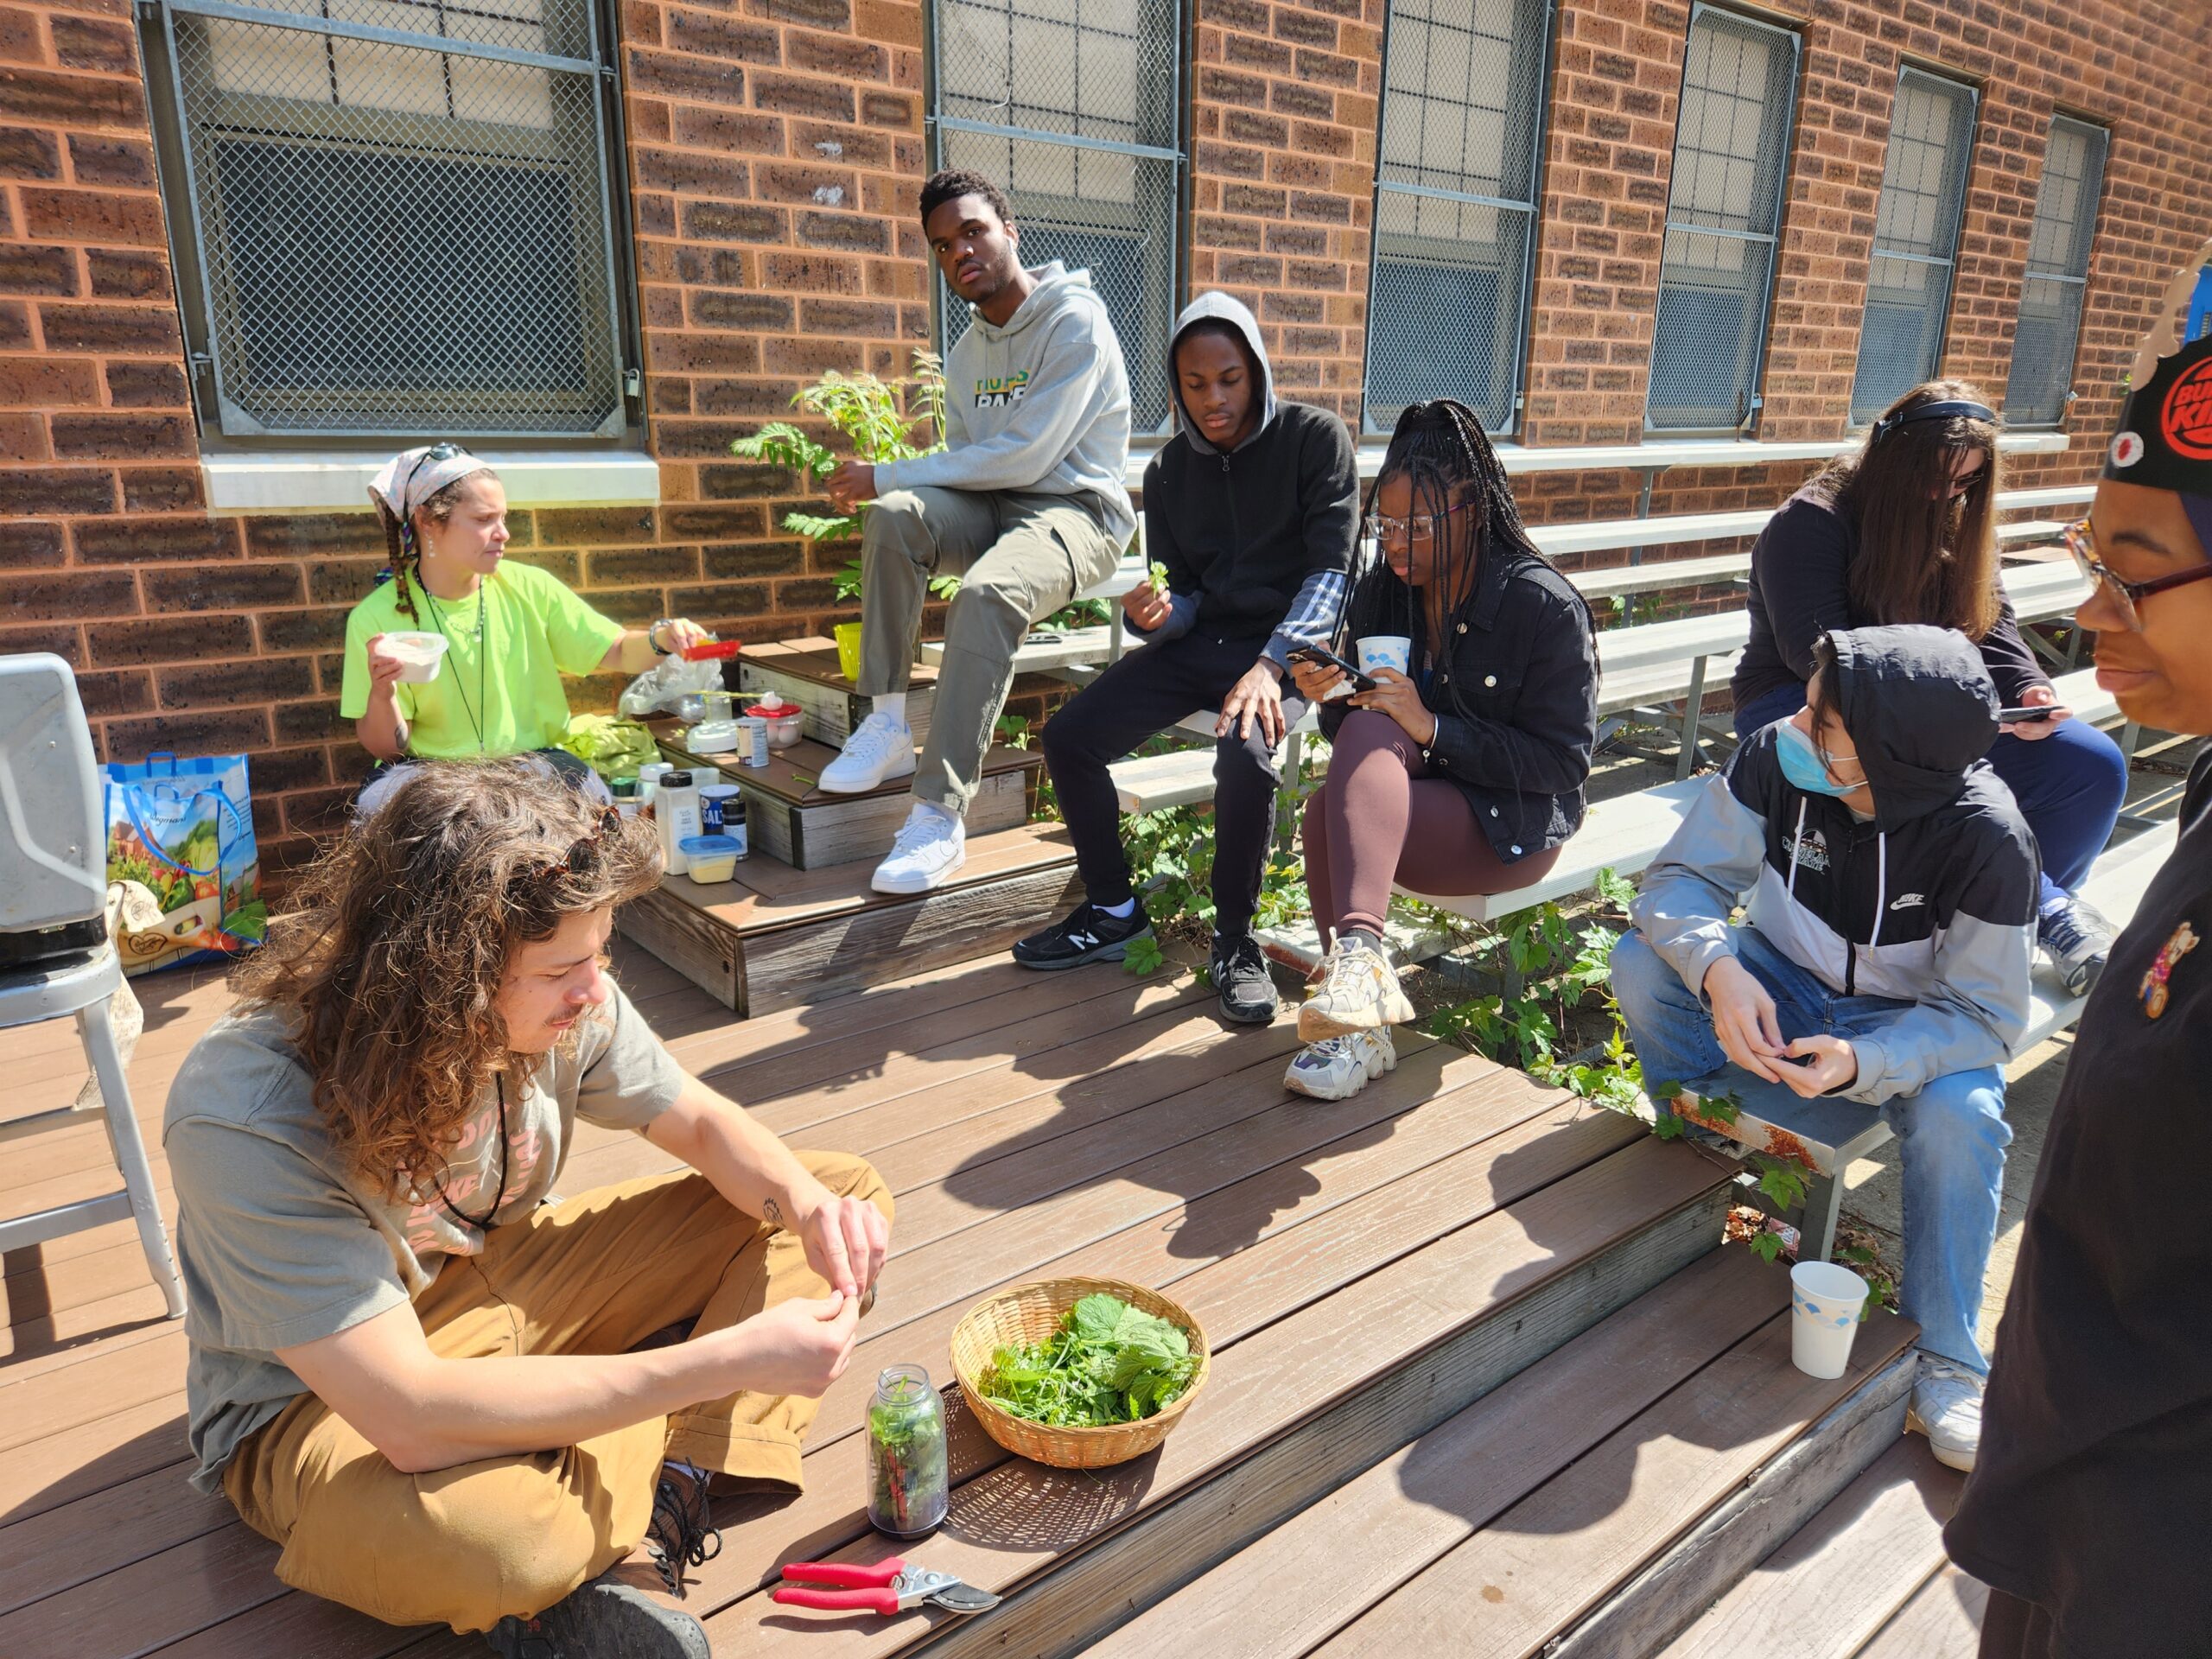
The class working together to prepare their foraged meal.

Last week, educators Sky and Nick visited W.B. Saul High School for the last in a series of lessons focusing on locally foraged food. During the program, our group worked from frozen soil with scarce pockets of onion grass and garlic cress all the way to full-on spring, rich with blossoms and fresh greens.

An aerial shot of several different foraged greens laying on a table, ready to be turned into pesto

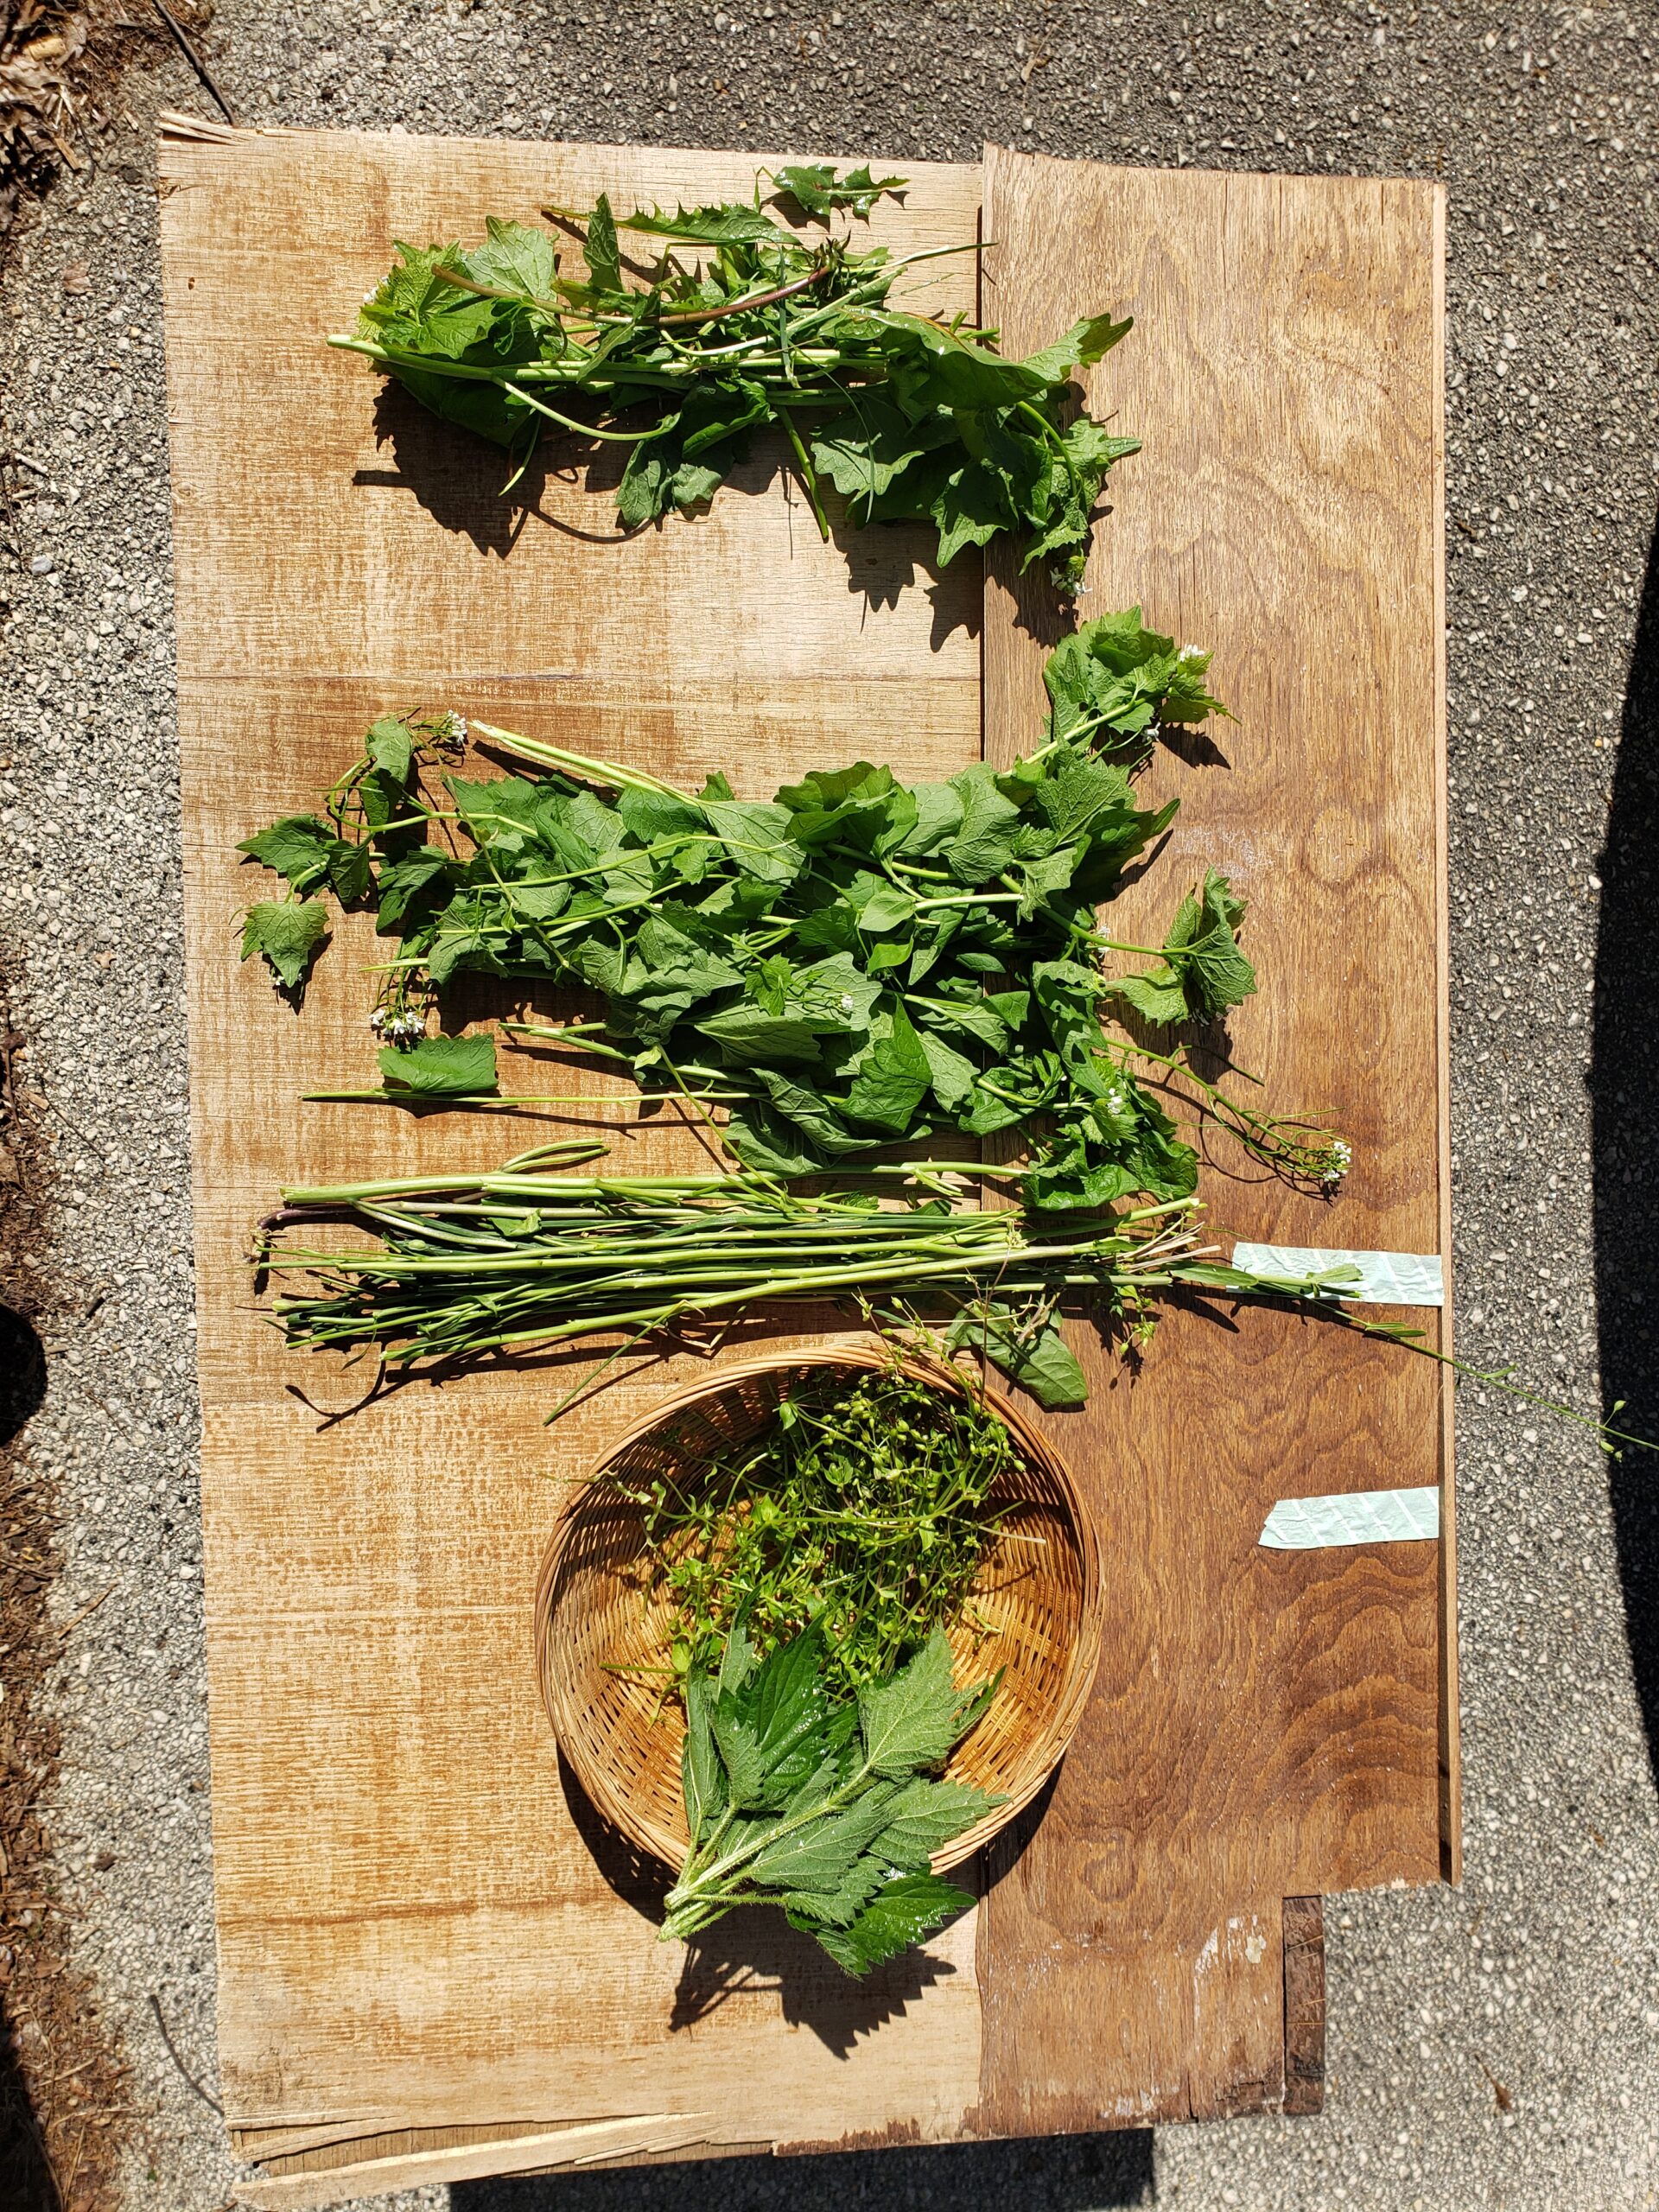
Foraged greens which will be blended into a pesto.

A hand dipping a cracker into a bowl of green, creamy pesto made from foraged weeds

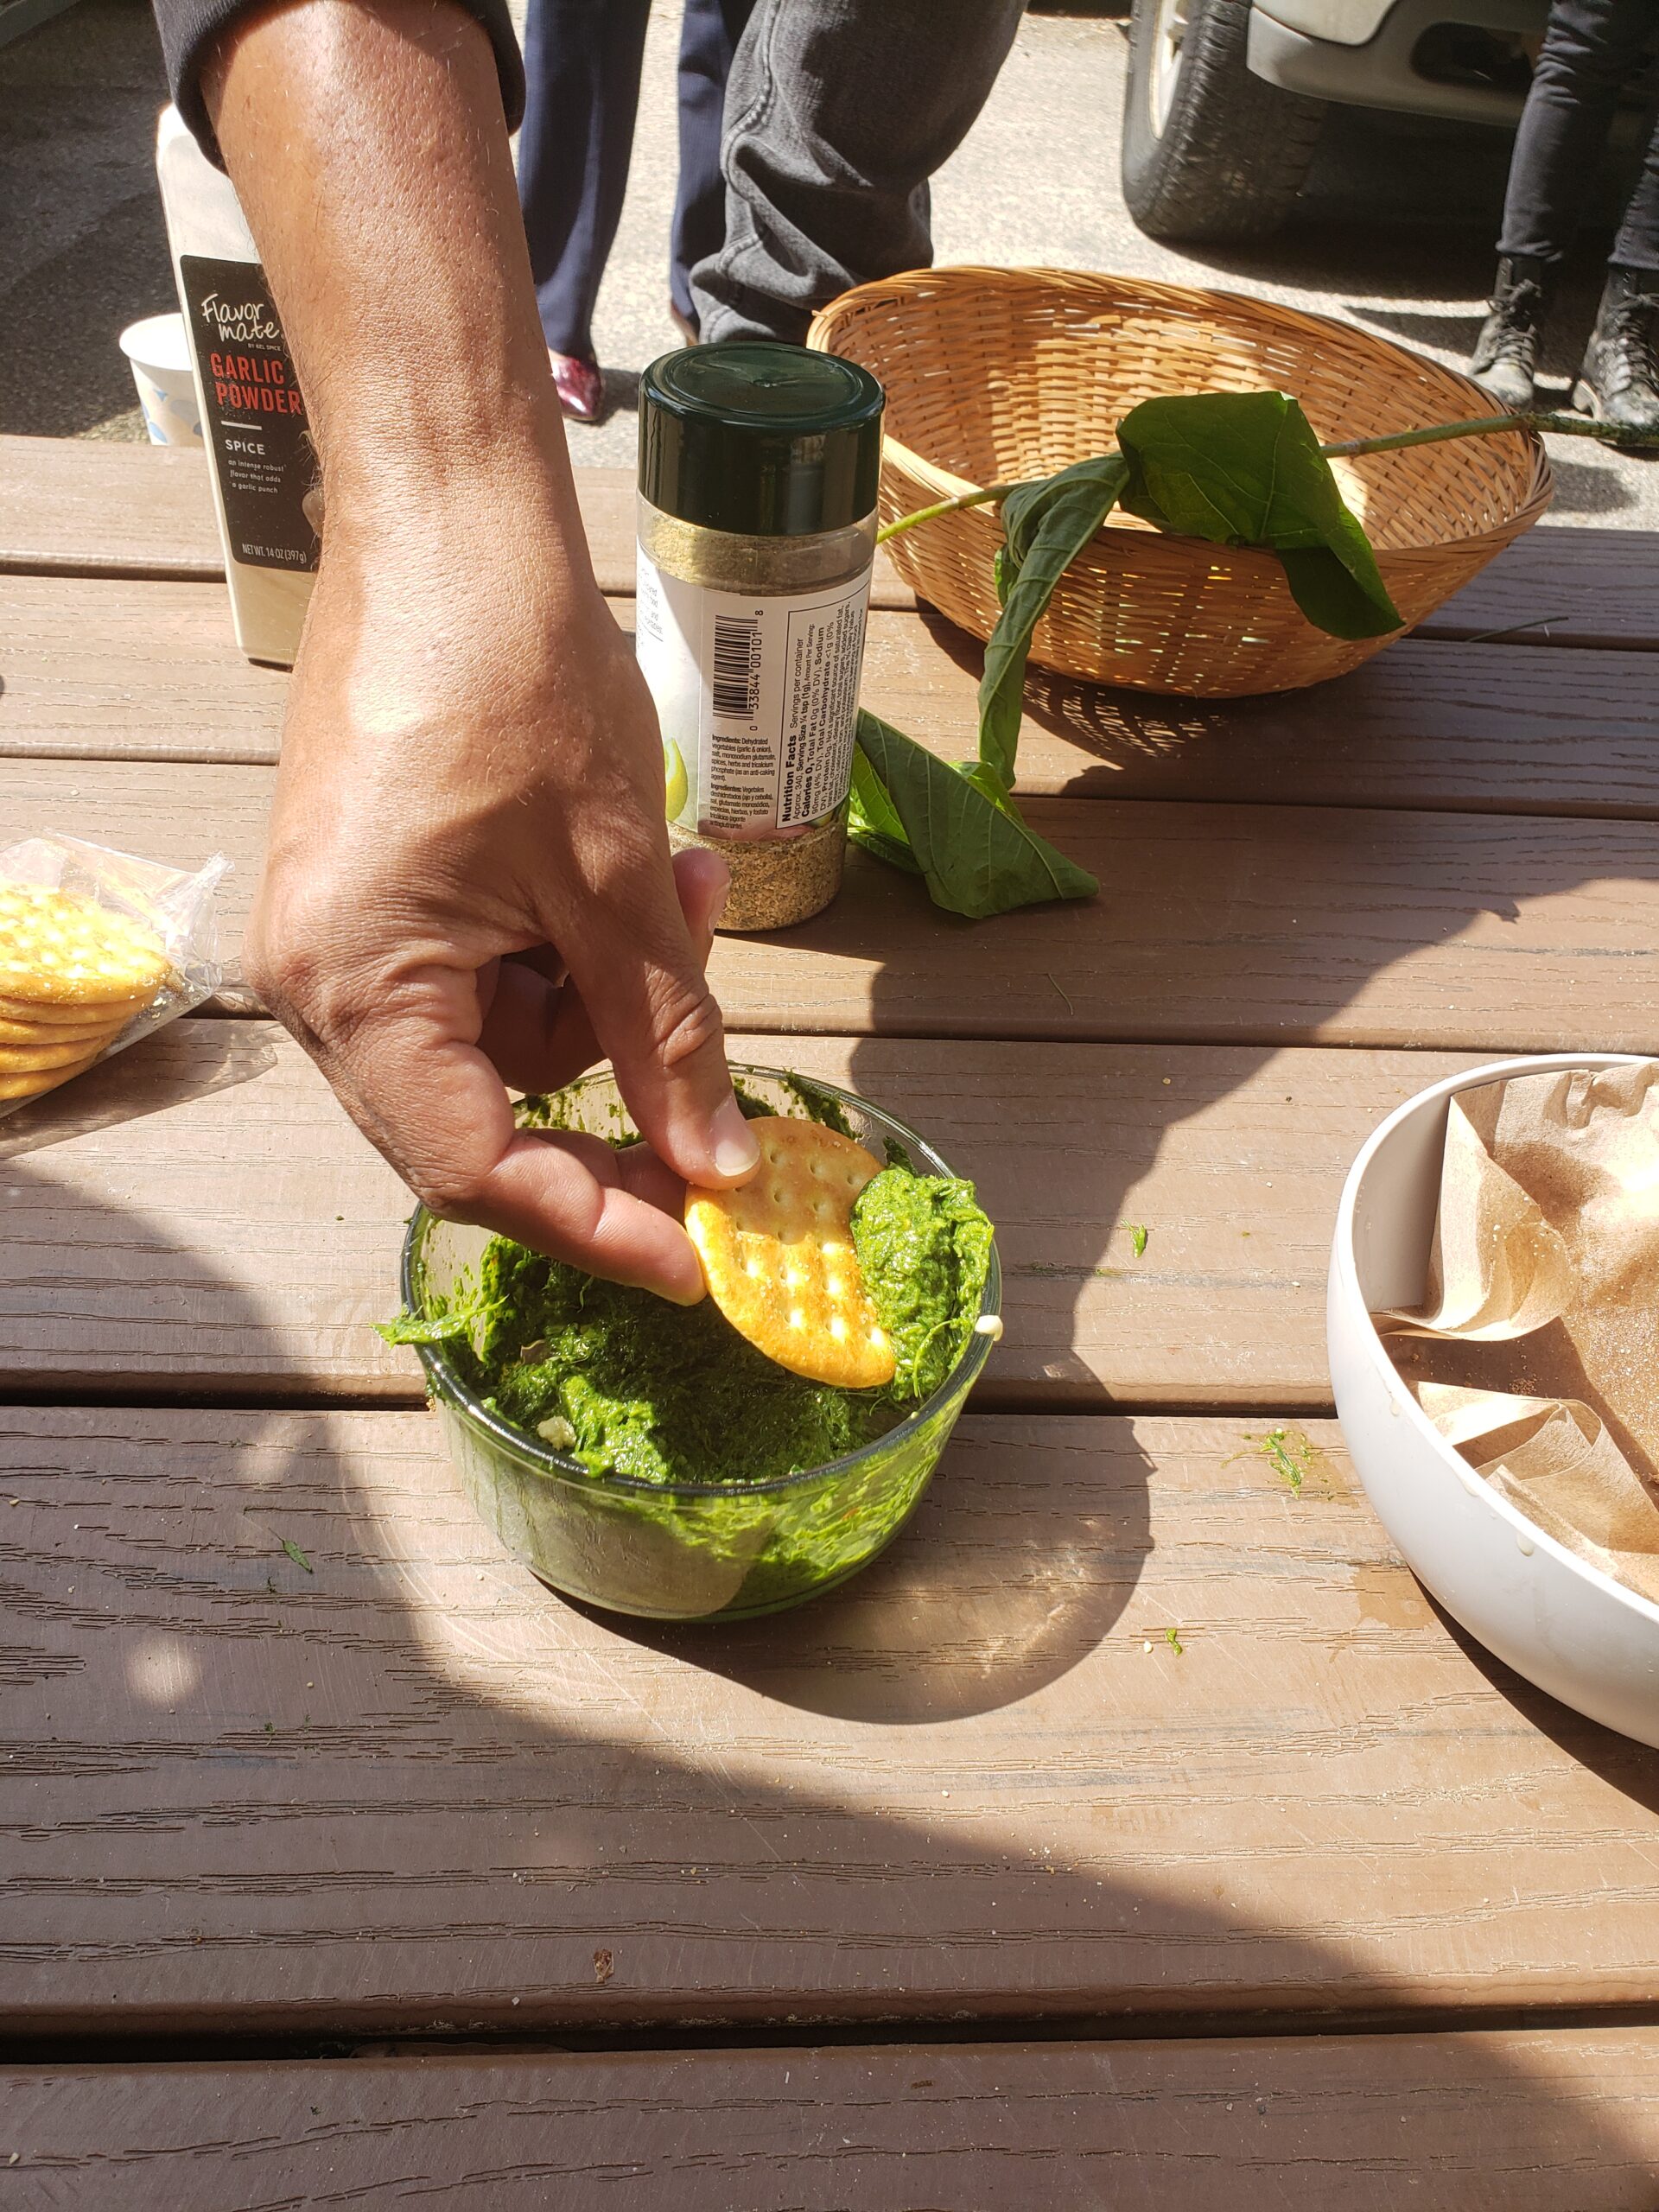
A taste test of the pesto made from foraged greens.

In the prior weeks, we’d spent time hiking, identifying and tasting plants, and discussing their various uses. In addition to learning which plants are edible, we discussed safety, theory, and ethics, such as taking only what you need and minding where you are. Most of the land in PA is privately held, and foraging on land without permission is illegal, so roadside foraging could easily turn into trespassing. Knowing the history of the land is also critical in minding exposure to potential toxins like heavy metals and plastics, especially in a post-industrial landscape such as Philadelphia. 

Despite these challenges in access to foraging, the ability to find your own wild foods remains empowering. For our second trip, we investigated how to use wild plants in unexpected ways: using tree flowers to make floral syrups and wild yeasts found on pine needles to make a probiotic soda. Both of these recipes required time to mature before consuming, leading us into our final lesson where we shared a foraged meal together.

One of our educators pouring pine needle soda from a green bottle into a paper cup

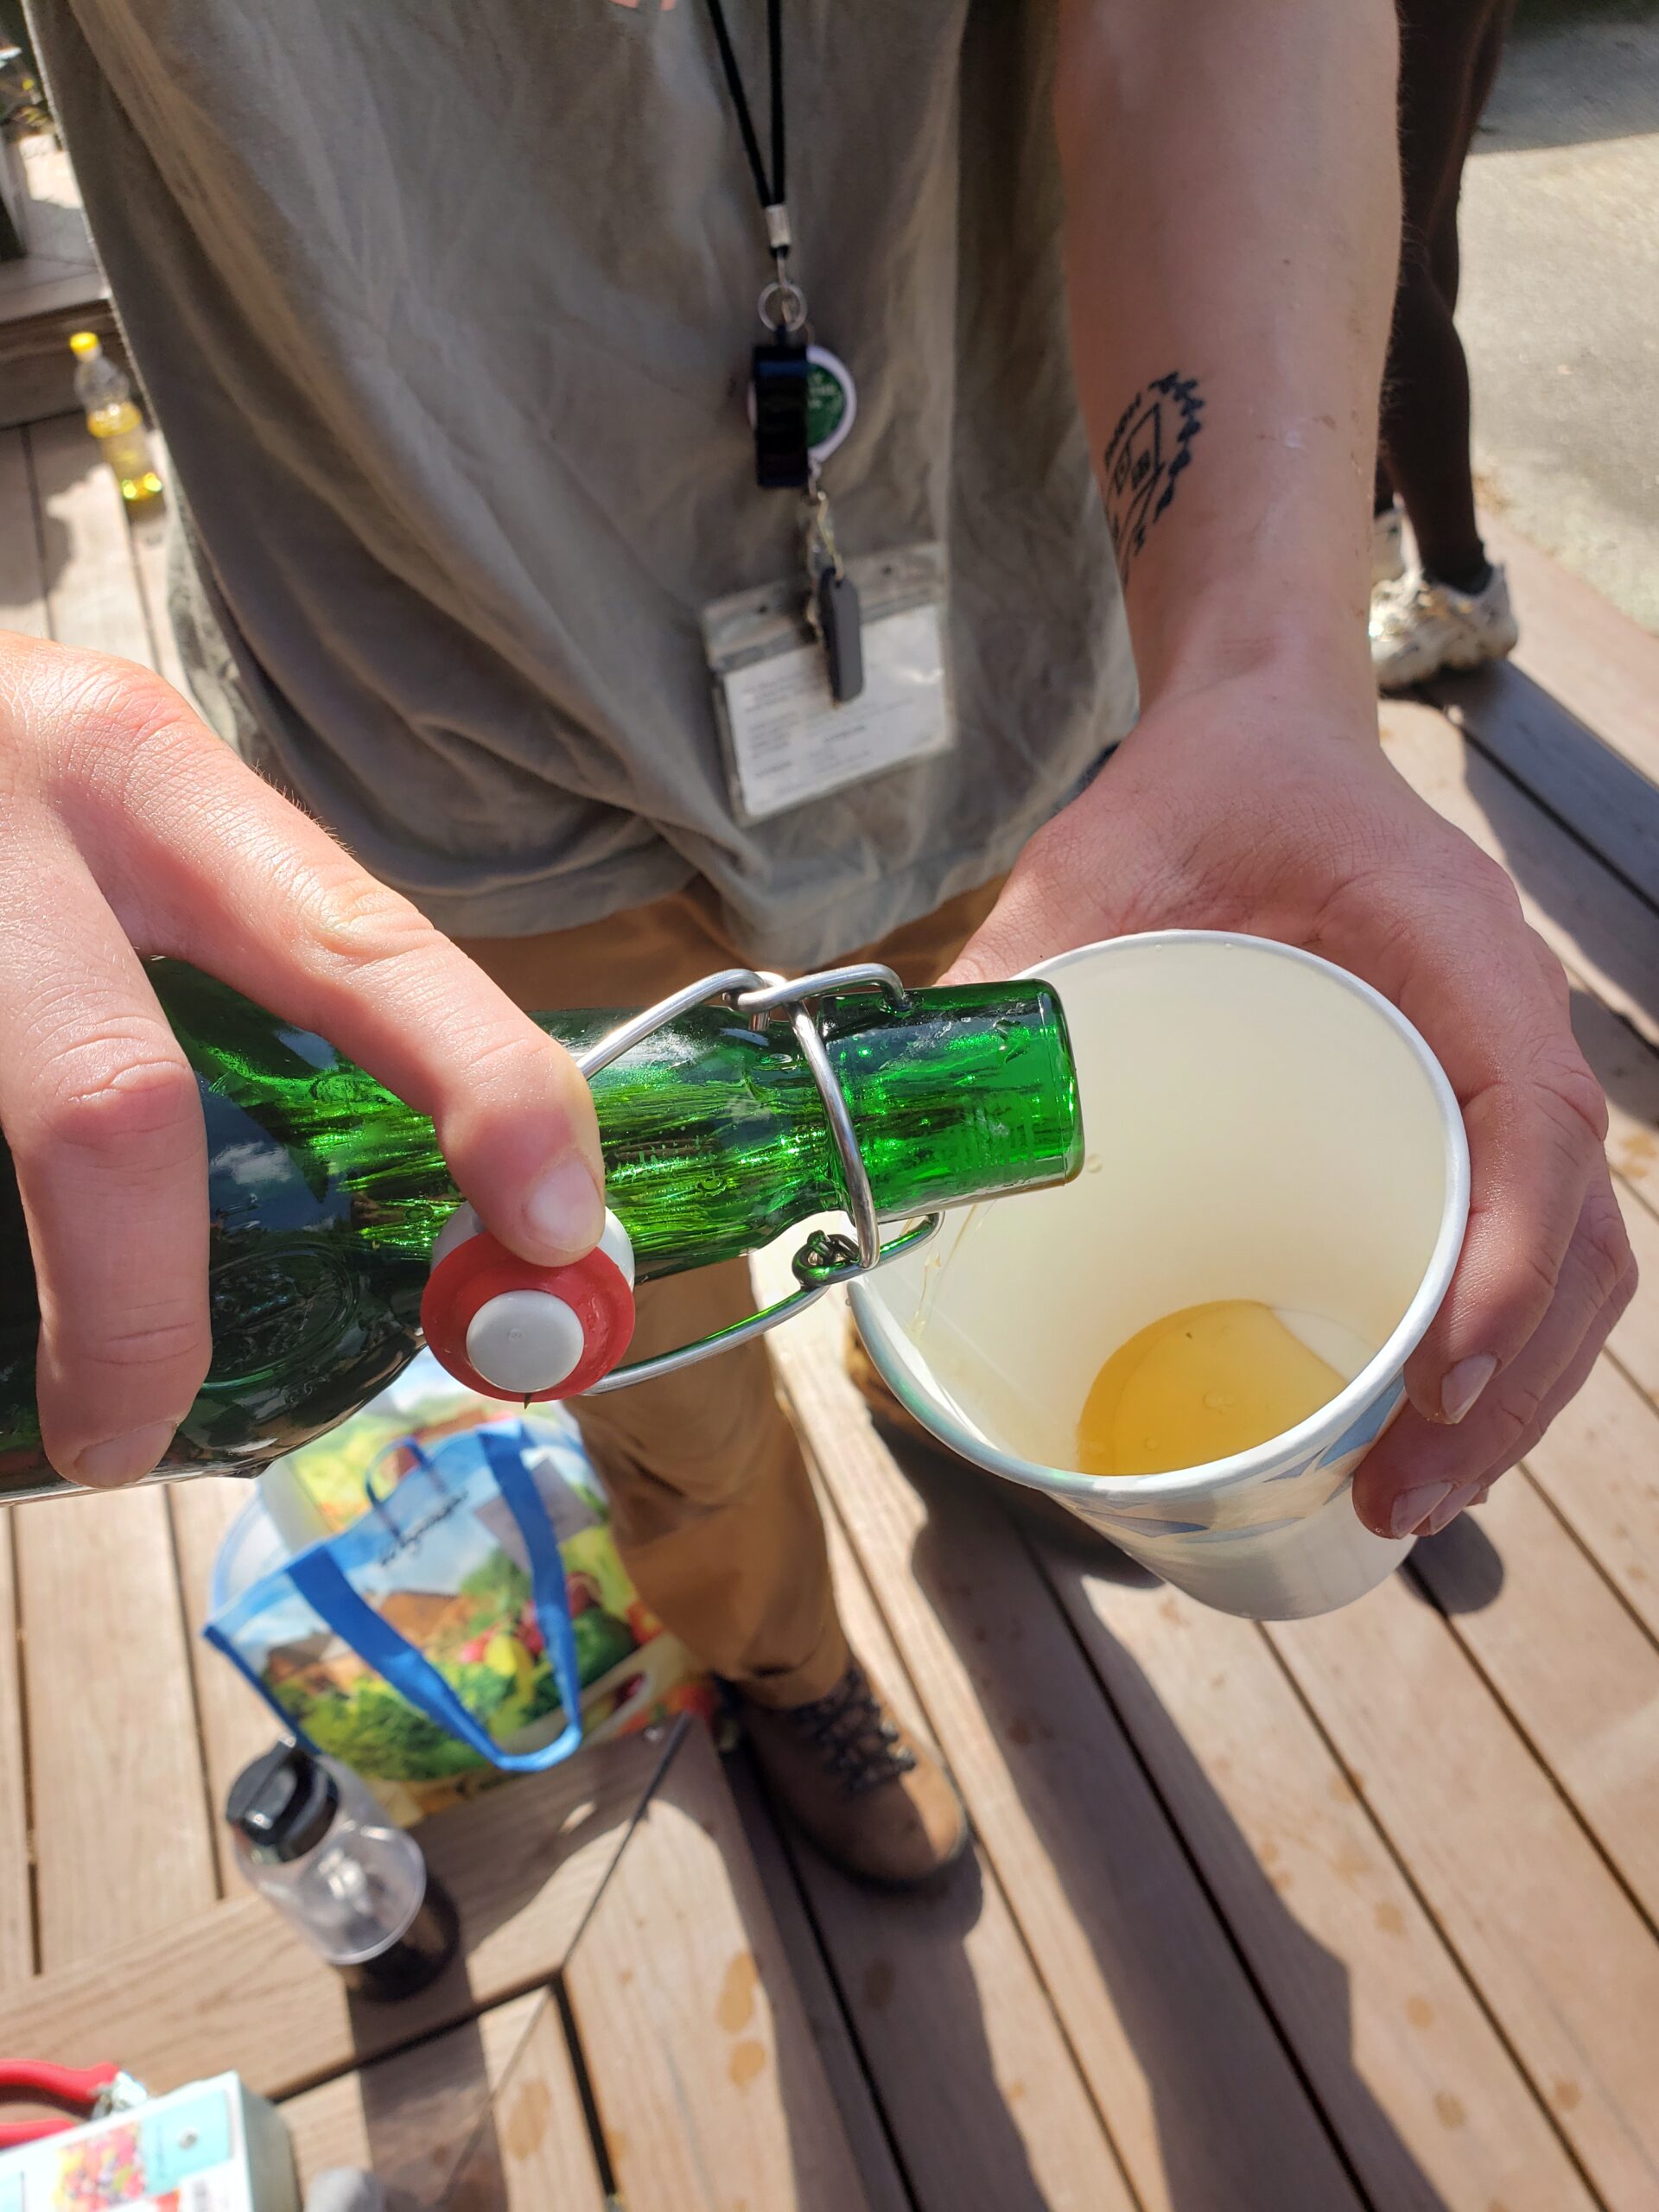
Soda made from fresh pine needles, sugar, and water.

Yellow dandelion fritters frying in a pan of oil on a gas-powered camping stove, pictured from above

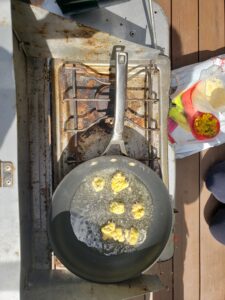
Fritters made from cornmeal batter and dandelion flowers.

Dandelions battered in seasoned cornmeal and pan-fried into crispy fritters were served up hot alongside a flavorful pesto made from wild garlic cress, nettles, garlic mustard, dandelions, and knotweed. The concoction of pine needles, sugar, and water had transformed into an intriguing soda similar to birch beer. The mealtime conversation centered around the collective question, “How could I bring foraged foods into my everyday life?” Because while the experience was very new, it was also easy, almost free, and delicious.

Finding joy in the outdoors

The return of leaves and flowers, insects and animals greets us each spring day at our Nature Preschool. Our children show up with smiles on their faces, ready to explore and discover what the day might have in store. As the weather turns warmer, we shuck off our mittens and boots and head out to see how the world is changing around us with the coming of spring.

Our 3-5 year old Nature Preschoolers–and their teachers–are a hardy bunch. They find joy in each day, whether that day includes sunshine and warm weather or rain and cold. Their days are spent hiking, climbing, and exploring in forests and fields, ponds and streams. As the children spend time in nature, their connection to the Earth deepens as they learn how it sustains us as well as all the wild creatures.

Children are natural explorers and scientists. While outdoors, Nature Preschoolers have thoughtful discussions about everything from using their senses to observe plants to why dead animals they found may have died. Climbing trees and balancing on rock walls teaches children to assess risks, as well as their own talents and limits. 

Rachel Carson writes in her book The Sense of Wonder, “If a child is to keep alive his inborn sense of wonder…he needs the companionship of at least one adult who can share it, rediscovering with him the joy, excitement, and mystery of the world we live in.” Our Nature Preschool teachers embody this idea, becoming guides for their students, holding their hands as they move through the world and helping them to learn not just facts, but how to be curious; how to retain that excitement and sense of mystery and wonder. They guide them in learning that we are all part of the same earth: humans, animals, plants, water, rocks, and dirt all need to exist together. A study of 216 children showed that those who attended nature preschools showed a higher level of nature connection than those in more traditional preschools.

Our Nature Preschoolers are the future stewards of our world, and if we can teach them these important lessons and foster their connection to nature at a young age, they will carry this knowledge and responsibility throughout their lives.

A literature review performed by the International Journal of Environmental Research and Public Health shows that there is growing evidence that nature-based early childhood education (ECE) improves social, emotional, and cognitive development in children. Specific areas of growth linked to nature-based ECE included self-regulation, social skills, play interaction, nature relatedness and awareness of nature. 

Children need nature. Natural environments provide unending opportunities for observation, exploration, inquiry, physical challenge, and imaginative play. At the Schuylkill Center’s Nature Preschool, we provide these opportunities for children every day. 

By Sarah Watrud, Director of Early Childhood Education

“City Nature Challenge” Nature Kit: At-Home Version

This weekend’s Nature Kit is all about the City Nature Challenge taking place right now, in Philadelphia and cities across the U.S. Every Saturday, Nature Kits are given out on a first-come, first-served basis from 10:00 am–12:00 pm. Nature Kits focus on a different theme each week and are meant to be done along our trails and given back once completed. If you can’t make it out to the Center to pick up a kit, make sure to check our blog each week for ways to get in some nature exploration at home.

What is the 2021 City Nature Challenge?

An international event that takes place every spring, this friendly competition between participating cities is a way to get people outside to document plants and wildlife in their cities. From April 30 – May 3, all pictures of wildlife uploaded to iNaturalist in the Philadelphia region will be documented for the purpose of this challenge, with the goal being to record the largest number of species in our city. To participate, you can simply head outside and start taking pictures of all the wildlife species you see! (Don’t forget about those plants!)

To participate using the FREE iNaturalist app:

  • Download iNaturalist from your app store or by visiting inaturalist.org.
  • Create an account.
  • Begin making observations! 
    • Tap the “+” sign in the bottom right corner. 
    • Select “take photo” and take your picture.
    • Tap the “what did you see” button and select the picture that looks the most similar to what you saw.
    • Hit the green check mark at the bottom.
  • If you do not wish to download the app, you may still participate by using the observation cards below to record any wildlife observations!


Optional Wildlife Observation Cards (print as many as you’d like):

—Rebecca Deegan, Environmental Educator

Migration Nature Kit: At-Home Version

This week’s nature kits focus on migration. Twice a year creatures such as certain birds and butterflies make thousand-mile journeys between North and South America. After today’s activity you will understand some of the unique challenges and needs of migrating animals, and you will learn how you can help them safely make their journeys. 

Every Saturday, Nature Kits are given out on a first-come, first-served basis from 10:00 am–12:00 pm. Nature Kits focus on a different theme each week and are meant to be done along our trails and given back once completed. If you can’t make it out to the Center to pick up a kit, make sure to check our blog each week for ways to get in some nature exploration at home.

Activity #1: Migration Hopscotch:
  • Draw a hopscotch board with 10 numbered squares on the pavement with chalk.
  • Then gather 8-10 items that will be placed on the squares later.
    • The items can be anything that you find—sticks, pinecones, toys, rocks, utensils, etc.
  • After drawing your board, stand in front of the #1 square; you are a bird starting your migration from north to south.
    • Each square represents a stopover-site between North America (Canada) and South America.
    • Migrate southward on the course by hopping from square to square until you arrive past square #10.
    • Before you turn to head back north, have your grownup place 2 items on 2 different squares—these are sites that no longer have resources for you to use.
    • Hop back north without stepping on the squares that have these props.
    • Continue placing more props on empty squares before every new round until it is impossible to migrate due to lack of squares (resources).
  • When the game is done, think about the importance of resources such as food, water, and land to a bird’s successful migration.
    • What happens if those resources are taken away? How can we save resources for migrating birds? 


Activity #2: Nesting Tree Memory Game

Did you know that some birds, such as swallows, return to one tree year after year to nest? Scientists are still unsure how they are able to find the same tree after migrating thousands of miles away from their warm overwinter spots in the south. Do you think you would be able to remember your nesting tree?

    • In your yard or a park, choose one tree that will be your final destination nesting tree.
    • Then create a trail to get to your final tree, finding 4 trees along the way to “rest” at before arriving at your destination.
      • Touch each tree before moving onto the next one, as your grownup records the order of the trees that you stopped at.
    • After you arrive at your nesting tree, leave the area for at least 10 minutes, then return and try to perfectly repeat the order of the trees you touched on your trail to your nesting tree.
    • Were you able to remember your route precisely? 
Activity #3: Migration Resources Scavenger Hunt

Nearly all migrating creatures need to make stops along the way to their destination to replenish on water, food, and rest.

  • Choose a migrating bird you would like to become.
  • Think about what resources this bird would need during its journey – what food do you eat, and where would you find it?
    • Where do you like to rest – in water, in a tree, in a meadow?
    • What about drinking water?
  • Plan out places in your yard or a park that you would need to visit to survive your flight.
    • In the table below, record the resources you find by checking off boxes with a pencil. 

Migration Resources Scavenger Hunt

Resource 

(up to 3 sites)

Check box when you find this resource Check box when you find this resource Check box when you find this resource
Food (must find at least 1)

What does your bird eat? Examples: insects, worms, berries, plants

Drinking Water (must find at least 2)
Shelter or a place to rest (must find at least 1)


—Rebecca Deegan, Environmental Educator

Water Nature Kit: At-Home Version

World Water Day is on Monday March 22. According to the United Nations, World Water Day “celebrates water and raises awareness of the global water crisis,” and this year’s theme is valuing water. Let’s celebrate our favorite liquid with these fun activities! (To learn more about World Water Day, and join in on the virtual celebration, visit https://www.unwater.org/worldwaterday2021/.)

Every Saturday, Nature Kits are given out on a first-come, first-served basis from 10:00 am-12:00 pm. Nature Kits focus on a different theme each week and are meant to be done along our trails and given back once completed. If you can’t make it out to the Center to pick up a kit, make sure to check our blog each week for ways to get in some nature exploration at home.


Activity #1: Drops on a Penny

There are many properties of water that make it unique. One of these is its high surface tension. Surface tension describes the strong “layer” at the top of water. It’s what makes it possible for the water strider to “walk” across the surface of water. But don’t take my word for it. Test it yourself!

Materials: penny, eyedropper, water

  • Place a penny on a flat surface. (Choose wisely—the surface will get a little wet!)
  • Use an eyedropper to slowly drip drops of water onto the penny.
  • See how many drops you can add before the surface tension breaks. 

Activity #2: What floats your boat?

Buoyancy is the force that allows things to float on water. A paper boat, for example, floats on water because the force of the boat pushing down towards the water is less than the force of buoyancy pushing up from the water. Test it out by making your own origami boat using the graphic instructions below.

Materials: 8.5×11 paper, bowl or sink full of water, coins/stones optional

  • See if your boat can float in a tub of water or a sink.
  • Place small stones or coins into your boat to see how much weight it can hold until it is no longer buoyant and sinks.


Activity #3: Water on the Move!

Water is the liquid form of H2O. As a liquid, it has some unique properties that allow it to move about. One way water moves is through capillary action. Simply put, capillary action is the ability of a liquid to move without—or even against—gravity through a small space. Water will wick, or draw itself upwards, because it likes to stick to itself and often also to the surface around it. See for yourself!

Materials: cup, 10×2 inch strip paper towel, washable markers, water.

  • Get a cup and fill it with about 1 inch of water.
  • Cut a 10×2 inch strip of paper towel.
    • Use washable markers of varying colors to draw a line of circles across the 2 inch width about 5 inches up the strip.
    • Fill in the circle.
  • Drape the paper towel over the edge of the cup so that the bottom is just touching the water.
    • Fold the top over the edge to keep it from falling in.
  • Now wait and watch!
    • Can you see the water moving up the paper towel?
    • What happens when the water reaches the dots of marker ink? 

Patti Dunne, Environmental Educator

At-Home Nature Explorer Kit: Aquatic Macroinvertebrates

We’re talking about water bugs for this week’s Aquatic Macroinvertebrates themed nature kit. Aquatic macroinvertebrates—“macros” for short—are tiny water creatures that do not have a backbone and are large enough to see with the naked eye. Some are aquatic worms, crustrasians, or animals with a shell, like snails. Many others are the young stage of insects you are probably familiar with, like the dragonfly. From freshwater to saltwater and streams to ponds, each water habitat is called home by a unique variety of macros. These critters might be small, but they play an important part maintaining the health of the exosystem. 

Activity #1: Macro ID

When you find a macro in the wild, you will probably want to identify it. The tool we use to identify macros is called a dichotomous key. This key works by asking you a second question that will slowly help narrow down the possibilities until you are able to identify the specific macro you have found. Give it a try!

  • Use the dichotomous key linked here to identify the macros below.

  • Scroll to the bottom of the post to see if you identified them correctly.


Activity #2: Make Your Own Dichotomous Key

Materials Needed: 10 items in a similar category (details below); pencil; paper

Scientific Skills:

  • Observation
  • Identification
  • Categorization 

Instructions:

  1. Start by deciding what you want to categorize. You’ll need to be pretty familiar with your items since the end goal is to be able to identify them. Consider using familiar plants or insects you can find in your yard, or even sort something in your home, like kitchen tools or your stuffed animal collection. Get creative!
  2. Set out your items. I would suggest about 10 items. (If you’re using natural items, you don’t need to collect/pick them, but it does make the activity easier to be able to see them all at once.)
  3. Take a few minutes to make some observations about the items.  Ask:
    • What makes them similar?
    • What makes them different?
    • Do I notice any similarities among several of my items? 
    • Does any one item really stand out from the rest?
  4. Now you’re ready to start making your key. Begin by deciding what 2 main groups you could break your items into. Every item needs to fit into one of these two groups, so they should be pretty broad. To use stuffed animals as an example, maybe you could split them up into big & little or real & imaginary.
  5. Now pick one of those groups to focus on. In this group, are there 2 or 3 smaller groups you could break your items into? 
  6. Keep going. Continue this process of breaking the items into smaller and smaller groups until each item is named specifically. (If you feel stuck, you can peak at the example below.)
  7. Ask a family member to test it out! Give them a single item and ask them to follow your key to see if they can identify the item you gave them.
  8. Share it with us! Take a picture of your key and sorted items and tag us @schuylkillcenter on Facebook or Instagram. We can’t wait to see what you come up with!


Activity 1 Answer:

Water Boatman (left) & Dobsonfly Larva (right)


Patti Dunne, Environmental Educator


The First Wildflower of Spring is…Skunk Cabbage?

March comes in like a lion, the old saw says, but the last thing any of us needs right now is for March to roar in this; after the winter we’ve been through, we’re all completely exhausted by snow and ice. I’ll take a heaping helping of lamb instead, please, thank you very much.

And right now I’ll also take whatever sign of spring I can. Which explains why I ran outside last week when I heard the familiar honking of Canada geese overhead. I looked up, and there they were: two low-flying skeins of geese in beautiful V-formation flying exactly due north– avian compasses telling me spring is coming. 

In that same vein, desperately seeking spring, I hiked the Schuylkill Center’s Ravine Loop two Saturdays ago, slogging through the snow and ice in search of the very first wildflower of spring, which blooms right about now, amazingly.

It’s skunk cabbage, named for its large stinky leaves—that strong chemical keeps herbivores like deer at bay. Its leaves aren’t up yet—they come later—but I was looking for its flowers, as the plant blooms surprisingly early, as early as late February. And the flower is tucked inside a small mottled purple hood that resembles something like the Sorting Hat from the Harry Potter universe. Incredibly, this hood is thermogenic, which means it is able to generate heat to melt the snow and ice around it. Temperatures around the hood are as much as 60° higher than the air around it. Crazy, no?

But that purple hood isn’t the flower. No, tucked inside the hood is a Sputnik-like knobby orb, rather Klingon-ish. Those knobs, unsexy as they are, are its flowers. And the flowers reek too, but a different smell, one akin to rotting flesh. This serves a huge purpose: attracting its pollinators, the flies and bees that scavenge on dead and rotting flesh. They crawl into the hood looking for dead meat, crawl over and across the yellow knobs, and accidentally pollinate the flower—a highly effective strategy. The purple mottling of its hood is surprisingly common in the pant world, as lots of plants have learned how to imitate dead flesh as a means of seduction.

And one of its pollinators is a blowfly with the wonderful species name of vomitoria. Need we say more?

Oh, the heat accomplishes multiple functions; it not only melts the ice around it, critical at this time of year, but also helps disseminate the smell. And pollinators are likely to come into the hood seeking the warmth that it generates. 

After blooming, its bright green leaves come up as well, some almost two feet long, their cabbage-like appearance lending the plant its name. 

As if all this were not cool enough, the plant’s stems remain buried below the surface, contracting as they grow, effectively pulling the stem deeper into the mud. In effect, it is an upside-down plant, the stem growing downward. As the plant grows, the stem burrows deeper, making older plants practically impossible to dig up. 

Sadly, I did not find skunk cabbage on that walk—I was just a little too early. So I’m going again this weekend, and invite you to do the trek yourself. Ask our receptionist for a Center map, and hike through the butterfly meadow, turning right and heading downhill on Ravine Loop. The loop makes a big left turn when it hits Smith Run, our lovely small stream, and it’s at that exact corner that you’ll see the skunk cabbage. Turn left to parallel the stream, then look on your left immediately for the wet, soggy, muddy spots—and the hoods will be interspersed in there. 

At that same corner and all along this stretch of the Ravine Loop, skunk cabbage will soon be joined by a raft of stunning flowers, the more traditional spring wildflowers with bold colors and big smells that look to entice the first butterflies and bees of spring. They’ve got sweet names too: spring beauty, Virginia bluebell, trout lily, trillium, Jack-in- the-pulpit, Jacob’s ladder, Dutchman’s breeches, Solomon’s seal. Colorful names. And great sights for very winter-weary eyes.

They’re coming, I promise! But for now, come see the first flowers of the coming season. And happy almost-spring.


—By Mike Weilbacher, Executive Director


Sticks Nature Kit: At-Home Version

This week’s Nature Kits focus on sticks. Even though we often overlook them, sticks are important parts of habitats. Sticks can be used for habitats or homes and can also be hosts for small organisms like moss and lichen.

Every Saturday, nature kits are given out on a first-come, first-served basis from 10:00 am-12:00 pm. Nature kits focus on a different theme each week and are meant to be done along our trails and given back once completed. If you can’t make it out to the Center to pick up a kit, make sure to check our blog each week for ways to get in some nature exploration at home.


Activity #1: Stick Scavenger Hunt

Sticks are different from branches. A branch is connected to a tree. Large branches are called boughs and small branches are called twigs. Sticks are branches that are no longer connected to a tree and are on the ground.

  • Go on a walk in your backyard or at a nearby park.
  • Use the stick scavenger hunt to find sticks in different shapes and sizes.
    • Since sticks can be used for homes or habitats, it is best to leave them where we found them. You can, however, use a camera to take a picture of the different types of sticks that you find.
    • Check the items you find off on your scavenger hunt sheet as you go along.
Activity #2: Stick Writing
  • Collect sticks large and small and use them to make different shapes, letters, and numbers. Some ideas for what to make include: 
    • A letter from the alphabet with curved lines
    • A letter from the alphabet with straight lines
    • The first letter or your name or, if you have enough sticks, your entire name
    • The number that corresponds with your age
    • A shape with straight lines
    • Using only four sticks to make a letter, number, or shape
  • What was the easiest shape, letter, or number to make with sticks?
  • What was the hardest?
    • Remember to put the sticks back where you found them once you are finished.
Activity #3: Not Just a Stick
  • In her book Not a Stick, Antoinette Portis talks about all the things that sticks can be if you just use your imagination.
    • A stick can be a fishing pole catching a shark, a paintbrush for painting a masterpiece, or even a wand for casting spells.
    • Listen to the reading of the book here.
    • Find a stick outside to use as inspiration.
    • Then grab a piece of paper and some crayons and use your imagination to draw some other unique things that sticks can be. Have your grown-up try to think of some ideas as well.
Activity #4: Habitat Building

Animals such as birds, beavers, and squirrels will use sticks to build their homes or nests. Squirrels and certain types of birds will start building their nests by weaving grass and twigs together. They will then line their nests with soft materials such as leaves or moss. Use the guidance below to try to make a bird nest and a beaver dam using sticks. 

Bird Nest

Birds will use their beaks to carry small sticks and twigs to their nesting locations. They will weave the sticks together with other soft materials such as grass, moss, and leaves to make a cup shape.

  • Use your pointer finger and thumb as a beak and move natural materials to your nest site similar to how a bird would.
  • Once you have all of your materials, try weaving them together to make a nest, using the picture below as a guide.
  • Nests are easy to see in the winter when the trees are bare.
    • Do you see any nests in the trees?
    • Squirrel nests or dreys are particularly easy to find, and they typically look like large bundles of leaves.
    • Do you see any squirrel nests in the trees?

Beaver Homes

Beavers build dams in order to create small ponds in which they then build their homes. They make these dams by using large sticks.

  • Find a medium to large sized rubber maid and use sticks to make a dam in the middle.
  • Once your dam is constructed, slowly pour water onto one side of the rubber maid.
    • Did most of the water stay on the side where you poured it?
      • If so, you’ve created a successful dam!
      • If not, empty out the water and try to reconstruct your dam before trying again.
  • If you don’t have a rubber maid at home, you can also try this experiment by digging a small gully outside.
    • Make sure to fill the gully back in once finished.


Nature’s Music At-Home Activities

This week’s nature kits focus on the different sounds that we hear outside. From the calling of birds to the whistling of wind to the crunching of leaves—nature is alive with its own special type of music. 

Every Saturday, nature kits have been given out on a first-come, first-served basis from 10:00 am–12:00 pm. Nature kits focus on a different theme each week and are meant to be done along our trails. If you can’t make it out to the Center to pick up a kit, make sure to check our blog each week for ways to get in some nature exploration at home.

Activity #1: Sound Scavenger Hunt

In our own neighborhoods, there are sounds specific to nature and sounds not specific to nature.

  • Print out a sound scavenger hunt and go on a hike to see if you can hear the sounds on the sheet.
    • As you hike around, pause at a few points and cup your hands around the back of your ear to look like the ears of a deer. This helps to amplify sound or make it louder.
    • Animals like deer and rabbits have large cup-shaped ears so that they can listen for predators such as foxes and coyotes.
    • Which sounds on your scavenger hunt sheet are sounds from nature? Which are sounds that are not from nature? Are there any sounds that you hear that aren’t on the scavenger hunt sheet?
Activity #2: Animal Charades
  • Take a piece of paper and cut it into strips.
    • Brainstorm some animals that make distinct sounds and write (or draw for younger children) one animal on each piece of paper.
    • Put all of the slips of paper in a brown paper bag.
  • Go outside and find the perfect stage to perform your charades.
    • Have one person from your family pick a piece of paper from the brown bag and make the sound that that animal makes.
    • Can everyone else guess what animal it is?
    • Have another person take a turn.
      • For an extra challenge, split your family into teams and see who can get through the most animals in a set amount of time.
    • Which animal sounds were really easy to guess? Which were really hard?
Activity #3: Family Nature Band
  • It’s time to create your very own rock band!
  • Have each member of your family find a nature instrument.
    • Some examples include: using a rock and stick for a drum set, making an xylophone out of different sized sticks, or just grabbing some leaves to crunch.
  • Have one person from your family act as a conductor.
    • When the conductor moves their hands quickly, the music should go faster.
    • When the conductor moves their hands slowly, the music should slow down.
    • The conductor can also tell certain people when to stop or start playing.
      • Point to someone to tell them to start playing.
      • Act as though your hand is a mouth and clamp your fingers together to tell someone to stop playing.
  • Can you put together your own family song?
Activity #4: Jingle Sticks
  • Find a Y-shaped stick in your backyard or a nearby park.
  • Tie a piece of yarn onto one side of the stick.
  • String materials that would make sound through the yarn.
    • Some examples include: dried pasta, beads, or buttons.
  • Once your materials are added, tie the yarn off on the other side of the stick.
    • You can wrap the bottom of your stick in yarn or color it with paint.


If you do any of these activities, be sure to snap a picture and share it with us on social media (tag us @schuylkillcenter)—we’d love to see what you discover in your own backyard!

Valentine’s Day Nature Kit: At-Home Version

Happy Valentine’s Day weekend! This week’s nature kits focus on the unique ways that animals find mates. Whether it’s by impressing their partner with elaborate courtship dances, showing off their brightly colored feathers, or by serenading them with beautiful calls, “love” in the animal kingdom stretches the gamut from cute to quirky to downright bizarre. 

Every Saturday, nature kits have been given out on a first-come, first-served basis from 10:00 am-12:00 pm. Nature kits focus on a different theme each week and are meant to be done along our trails. If you can’t make it out to the Center to pick up a kit, make sure to check our blog each week for ways to get in some nature exploration at home.

Bright Colors to Attract a Mate

Most flowering plants require the help of pollinators, such as butterflies, birds, birds, and even moths, to make new flowers. When pollinators pollinate a flower, they move pollen in the middle of the flower from one flower to another. When pollen moves from flower to flower, eventually a seed is created, and a new flower can grow from that seed. Since pollinators help to create new flowers, plants want to attract them. One way that they can do this is by being bright and showy.

  • Draw three flowers on a piece of white paper.
    • Use crayons or markers to color the outside flower petals bright colors, making sure that each flower looks different.
  • Go to your backyard or a nearby park and place the flowers in three spots.
    • Your grown-up will pretend to be a bee.
      • While you are placing the flowers, have them close their eyes.
      • Make sure to not hide the flower completely.
      • Your grown-up should still be able to see at least part of the flower from where they are standing.
    • Have your grown-up turn around and try to locate the flowers by their bright colors.
      • Did the bright colors help them to locate the flower?
      • Which flower were they able to see first?
      • Was this the most colorful one?
    • Have your grown-up then move the flowers as you pretend to be the bee.
      • Activity Extension: Color the center of each of your flowers with a different color of chalk. Grab a cotton ball and pretend to be a bee by traveling from flower to flower. At each flower that you visit, rub your cotton ball bee in the “pollen,” or chalk, in the center. After you’ve visited each flower, look at the colors on your cotton ball. Is each flower’s pollen color represented on the cotton ball bee? If so, this means you’ve done a good job pollinating!


Dancing to Attract a Mate

The males or boys of some species will actually dance to attract a mate. These dances can often be really funny looking.

  • Use this courtship dance sheet to make your own funny dance.
  • Start by listing five movements that will be part of your dance.
    • Movements can be things like stomping your feet, patting your head, or snapping your fingers.
    • The number column is the number of times you would do that movement before moving onto the next one.
    • Fill out the sheet and then perform the dance as a family.
    • As an added activity, have each person in your family create their own dance.
      • Vote on who you think had the best dance.


Using Sounds to Attract a Mate:

Animals such as frogs, crickets, and owls will use mating calls to attract mates. They will call out loudly and their potential mate will decide whether or not to answer back based on if they like what they hear from the call. For this game, you’ll want to start out by finding a large field or backyard to play in. Have your grown-up close their eyes.

  • Choose one spot on the field to stand.
  • Have your grown-up clap their hands.
    • Whenever they clap their hands, clap yours back, making sure to stay in one spot as you do so.
  • Have your grown-up use their sense of hearing to find you.
  • Once they’ve found you, switch roles and try to use your hearing to find your grown-up.
  • Instead of clapping, try to make a different sound.
    • You can stomp your feet, snap your fingers, or make your very own noise maker (dried pasta or rice in a jar works well).
      • What noises make it easy to find one another?
      • Which noises make it a little harder?


Animal Valentine’s Day Cards:

Animals will care for one another by providing food to their young, helping their mate to build a den/nest, or even by warning one another of danger. There are ways that we can care for one another, and one way to do that is by telling the people in our lives why they are important to us. Valentine’s Day is a great time to do that!

  • Print out the animal Valentine’s Day cards that you like best.
  • Decide who you want to give your Valentine’s Day card or cards to and write, or have your grown-up write, their name in the bottom box.
  • In the message box, write or draw a picture that tells why that person is important to you.
  • Try to think about the things they do for you or the things that you like to do with them.
  • Give or send your Valentine’s Day card to that person.